How to Make a Visual Schedule
Click here to learn why visual schedules are beneficial to any child, especially those with autism.
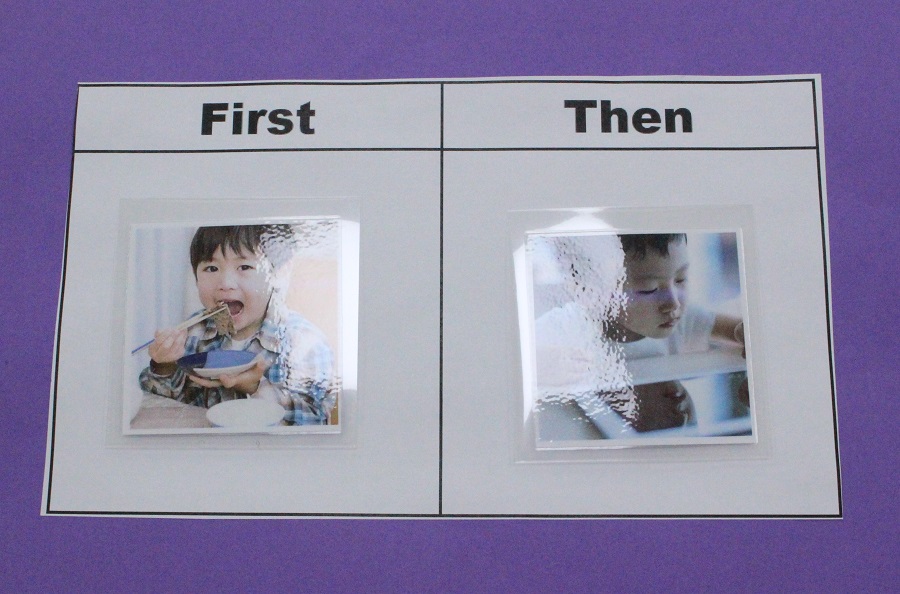
The most basic schedule is the First/Then Schedule: Usually non-preferred task followed by a preferred activity. Note: Do not use “if”/then, otherwise the option is open to negotiation.
For a full visual schedule:
- Break the day into several activities. Be detailed: represent even minor activities like break times and hand washing.
- Personalize the visual format according to the child’s needs and abilities.
- Determine how to indicate transitions or if a task is completed.
If you can’t fit the child’s entire day on a schedule, or if they do better with information in smaller chunks, it’s fine to just put up part of the day. Once the first section is complete, the schedule can be rearranged or you can reveal another schedule for the next part of the day.
There are many creative ways to make a visual schedule and you should tailor it to your child’s needs.
Formats of Visual Schedules
Picture/Icon/Photo Schedules
Activities are illustrated visually, either through pictures, icons, or photographs. Pictures can be attached to a schedule board with Velcro and removed once the activity is completed.
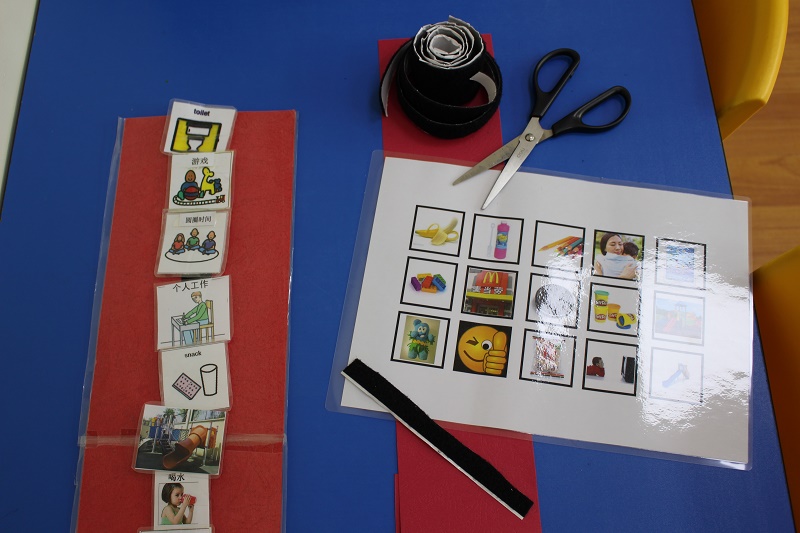
Object Schedules
Objects provide a more concrete representation of activities for children who find pictures and photographs too abstract. Objects can be placed in a row and moved once the task is completed. For example, a miniature book can represent story time and a small toy bus can represent getting on the bus for school.
Word Schedules
As children develop stronger reading skills, using words to represent activities will be more appropriate. To ease children into this format, you can have text overlaid on pictures, and slowly increase the size of the words while decreasing the size of the pictures as time goes on.
Presentations of Visual Schedules
Pull-Off Schedules
Velcro can be used to attach pictures and photograph cut-outs to a schedule. This makes it easy to focus on which activity is next, as completed activities can be pulled off the schedule.
Check-Off Schedules
All activities, either in picture or text format, are listed on paper and children can check off tasks and activities that have been completed. This presentation can be distracting for certain children as previous activities are still visible. Variations include crossing off items or using a dry erase board.
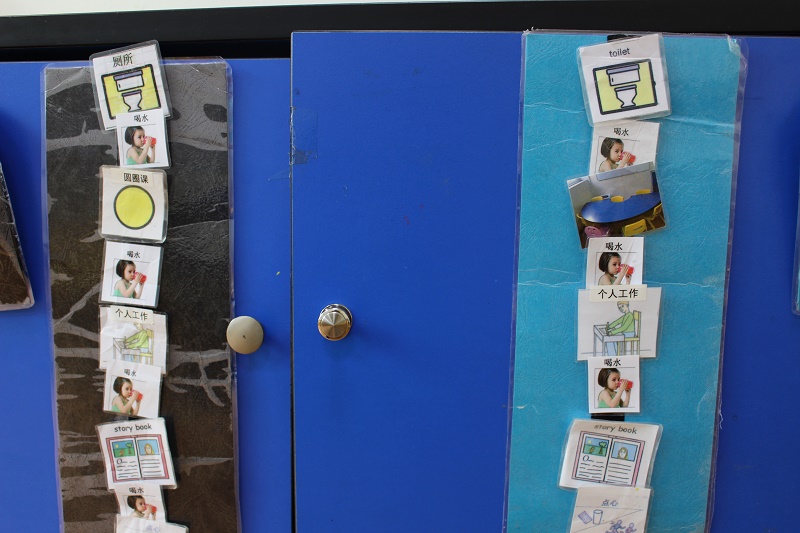
Stationary Schedules
Schedules are placed in a transition area (wall, table, cubby, etc.). Children can go to the transition area after each scheduled activity.
Mobile/Portable/Travel Schedules
The child carries their schedule with them from one activity or room to the next. These schedules can be check-off/cross-off schedules written on paper and placed on clipboards, binders. A mobile schedule allows the child to be able to check what the following activity is immediately.

How to Use a Visual Schedule
- Give a standard phrase (“check schedule”)
- Prompt child (from behind) to go to schedule
- Prompt child to look at or point to first activity
- Prompt child to go to location of first activity
- When the activity is over, repeat from above
Caretakers and educators can always direct the child’s attention to the schedule when the child is distracted. Visual schedules can also provide motivation for a child to focus on the task at hand by showing when they can expect to move on to a preferred activity.
It will take time for your child to understand the schedule. Use enough prompting to ensure your child figures it out, but encourage independence by slowly backing off to allow them to get to the schedule on their own.
Whether your child is on the autism spectrum or not, give visual schedules a try to encourage children’s independence, get them to stick to a routine, and potentially improve behavior and reduce anxiety. You can also get together with other parents for a fun few hours of arts and crafts, making visual schedules for your children and sharing your routines!